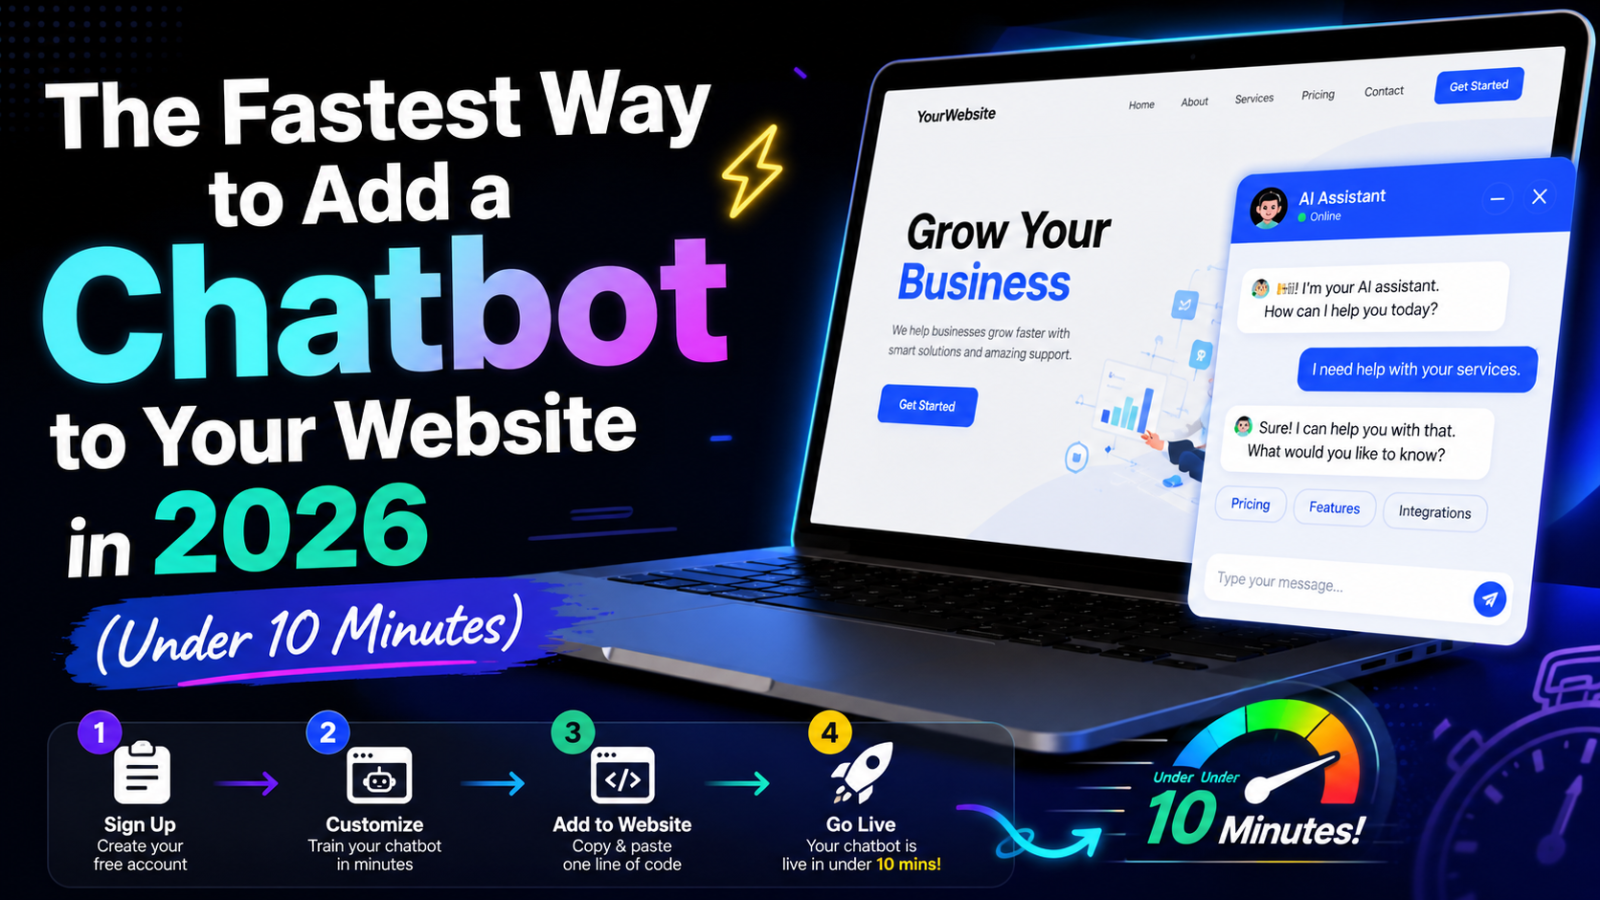
The Fastest Way to Add a Chatbot to Your Website in 2026 (Under 10 Minutes)
Discover the fastest way to add a chatbot to your website in 2026 — no coding, no developer, no delays. Go from signup to live AI chatbot in under 10 minutes with Glanceia.
Introduction
Most guides on adding a chatbot to a website make it sound like a project. They talk about API integrations, developer involvement, multi-week setup timelines, and enterprise onboarding calls.
For the vast majority of small and medium business owners, that is complete overkill.
The fastest way to add a chatbot to your website in 2026 takes under 10 minutes from the moment you open a browser to the moment the chatbot is live on every page of your site — answering visitor questions, capturing leads, and working 24/7 without any staff involvement.
This guide shows you exactly how to do it — step by step, as fast as possible — using Glanceia, the fastest no-code AI chatbot setup available for small business websites today.
Why Speed of Setup Matters
Every day your website runs without a chatbot is a day visitors are arriving with questions and leaving without answers.
The business you are losing is invisible — you do not see the visitor who spent 3 minutes on your pricing page, had one unanswered question, and booked with a competitor instead. You do not see the inquiry that came in at 10 PM on a Friday and went cold by Monday morning because nobody replied in time.
A chatbot fixes this. And the faster you can get one live, the sooner those visitors start converting instead of bouncing.
The fastest setup is not about cutting corners. It is about using a platform that has removed every unnecessary step from the process — so you are going from zero to live in the shortest possible time without sacrificing quality.
What You Need Before You Start
Getting a chatbot live in under 10 minutes requires almost nothing:
A computer with internet access
A business website (any platform)
A free Glanceia account — takes 60 seconds to create
One document with your business FAQ, services, or pricing — even a basic one
That is it. No developer. No plugin. No technical knowledge.
If you want to start with the absolute minimum, even a simple document with your 10 most common customer questions and their answers is enough to go live. You can always add more content later.
The Fastest Method: Step by Step
Minute 0–1: Sign Up
Go to Glanceia and click the sign up button. Enter your name, email address, and a password. Confirm your email. You are inside the dashboard.
No billing page. No credit card form. No onboarding survey that takes 15 minutes to complete. Just a working account ready to use.
Minute 1–3: Upload Your Content
This is the step that determines how useful your chatbot is from day one. The fastest approach is to grab the one document that contains the most information about your business — your FAQ page, your services brochure, your pricing guide, or your welcome pack — and upload it immediately.
Inside your Glanceia dashboard, navigate to the training section. You will see three options:
Option A — Upload a PDF If you have a PDF brochure, FAQ document, or pricing sheet already prepared, drag and drop it directly into the upload area. Glanceia processes the PDF in 30 to 60 seconds and the chatbot immediately knows everything in it.
Option B — Paste text If you do not have a PDF ready, open your website's FAQ page, copy all the text, and paste it directly into the text input field. It takes 30 seconds and works just as well as a PDF.
Option C — Add a URL If your website has a FAQ page, services page, or about page with detailed information, paste the URL into the URL field and Glanceia reads the page automatically.
For the fastest setup, use whichever option you can execute in the next 2 minutes. You can always add more content after the chatbot is live.
Minute 3–4: Write Your Welcome Message
Your welcome message is the first thing every visitor sees when the chat window opens. A good welcome message takes 30 seconds to write and significantly increases the number of visitors who actually engage with the chatbot.
Skip the generic "How can I help you today?" It tells the visitor nothing about what the chatbot knows or can do.
Instead, write something specific. Here are fast templates you can adapt in 20 seconds:
For a service business: "Hi! Questions about our services, pricing, or how to get started? I can answer right now."
For a travel or hospitality business: "Hi! Looking for a package, have a visa question, or want to know what's included? Just ask."
For an ecommerce store: "Hello! Want to know about a product, an order, or our return policy? I'm here to help."
For a clinic or healthcare provider: "Hi! Questions about our services, appointment booking, or pricing? Ask me anything."
For a SaaS or tech product: "Hey! Want to know how it works, see pricing, or check if we integrate with your tools? Ask away."
Pick the closest template, swap in your specifics, and you are done.
Minute 4–5: Customise the Widget
Two things to change right now — everything else can wait until after launch.
Color Change the chat bubble color to match your website's primary brand color. In most website designs this is one hex code change. A matching color makes the widget look like it was designed for your site rather than dropped in from somewhere else.
Chatbot name Set the name that appears in the header of the chat window. Use your business name or a simple label. This takes 10 seconds.
Everything else — position, icon style, font size — can be refined after the chatbot is live. Do not let perfectionism delay your launch.
Minute 5–6: Get Your Embed Script
Navigate to the deploy or embed section of your Glanceia dashboard. You will see your unique embed script — a single line of code that looks like this:
html
<script src="https://cdn.glanceia.com/widget.js" data-id="YOUR_ID" async></script>Click copy. The entire setup on the Glanceia side is now complete.
Minute 6–9: Add the Script to Your Website
This is the only step that involves touching your website. Pick the section below that matches your platform and follow the steps exactly.
WordPress (2 minutes)
The fastest method uses the free WPCode plugin:
Go to Plugins → Add New in your WordPress admin
Search for WPCode and install it
Go to Settings → Insert Headers and Footers
Paste your Glanceia script in the Footer Scripts box
Click Save
Done. The chatbot is now on every page of your WordPress site.
Wix (2 minutes)
Go to your Wix Dashboard → Settings
Click Custom Code in the left menu
Click + Add Custom Code
Paste your Glanceia script
Set Add Code to Pages to All Pages
Set Place Code in to Body — end
Click Apply
Click Publish on your Wix site
Webflow (1 minute)
Open your Webflow project
Go to Project Settings → Custom Code
Paste your script in the Footer Code box
Click Save Changes
Click Publish
Shopify (2 minutes)
Go to Online Store → Themes
Click Edit Code on your active theme
Open theme.liquid
Find the closing
</body>tagPaste your script just above it
Click Save
Squarespace (1 minute)
Go to Settings → Advanced → Code Injection
Paste your script in the Footer section
Click Save
Any HTML website (30 seconds)
Open your main HTML file, find the </body> tag near the bottom, paste the script just above it, and save. Re-upload the file if it is hosted via FTP.
Minute 9–10: Verify It Is Live
Open your website in a private or incognito browser window. The chat widget should appear in the bottom right corner.
Type a question — something a real visitor might ask, pulled directly from the content you uploaded. The chatbot should give an accurate, specific answer within seconds.
If the widget is not appearing, the most common reason is forgetting to publish on Wix or Webflow. These platforms hold changes in draft until you explicitly hit publish.
If the answer is not accurate, the content you uploaded either does not cover that topic or covers it vaguely. Add more specific content to the training section and it updates immediately.
Your chatbot is now live. It took less than 10 minutes.
What to Do in the First 24 Hours After Launch
Going live in 10 minutes is the goal of this guide. But the first 24 hours after launch are when you do the work that turns a fast setup into a high-performing chatbot.
Check the Conversation Logs
Within hours of going live, real visitors will start having real conversations with your chatbot. Open your Glanceia dashboard and review them. Look for:
Questions the chatbot answered accurately — these tell you your content is working
Questions it could not answer — these are gaps to fill immediately
Questions that reveal what visitors care about most — use this to improve your website copy
Fill the Content Gaps
For every question the chatbot could not handle, either add a new section to your FAQ document and re-upload, or paste the question and answer directly into the text content section. Every gap you fill makes the chatbot more capable.
Set Up Lead Capture
If you launched without configuring lead capture, do it now. Inside your Glanceia dashboard, configure the chatbot to collect visitor name and email at a natural point in the conversation — typically after answering their first question.
This turns every chatbot interaction into a potential lead your team can follow up on. Without it, you are answering questions but not capturing the contact information that makes those answers commercially valuable.
Share the Chatbot With Your Team
Let your customer-facing team know the chatbot is live. Tell them what it covers so they understand when it will handle an inquiry automatically and when it will escalate. Ask them to flag any questions it handles incorrectly — they will notice faster than anyone.
How to Make the Chatbot Even Better — Fast Improvements
The 10-minute setup gets you live. These improvements — most of which take under 5 minutes each — significantly improve performance.
Add more PDF content The single highest-impact improvement is uploading more content. If you went live with just a FAQ document, add your full services brochure. Add your pricing breakdown. Add your policies. Each additional document expands what the chatbot can answer accurately.
Improve your FAQ answers Go through your uploaded FAQ and look for answers that are vague or deflecting — phrases like "please contact us for more information" or "pricing varies." Replace every one with a specific, complete answer. This directly improves the quality of chatbot responses.
Configure multiple lead capture fields Beyond name and email, consider collecting phone number, project type, preferred appointment date, budget range, or destination — whatever qualifying information helps your team have a better first conversation with a lead.
Write a more specific welcome message If your initial welcome message was generic, update it now that you have seen how visitors actually engage. A welcome message that mentions a specific service or common question dramatically increases engagement.
Add the chatbot link to your email signature Add a line to your email signature: "Have a quick question? Chat with us 24/7 at [your website URL]." This drives existing contacts to use the chatbot for quick queries instead of emailing.
Why Glanceia Is the Fastest Way to Add a Chatbot
There are dozens of chatbot platforms available in 2026. Several of them are good. None of them get a non-technical business owner from zero to live faster than Glanceia.
Here is why:
No developer required at any step The entire process — from account creation to live chatbot — uses a visual dashboard. The only technical moment is pasting one line of code, which takes 20 seconds.
PDF training is instant Upload a PDF and the chatbot is trained on it in under 60 seconds. No manual question-and-answer entry. No conversation flow design. Just upload and go.
One embed script for every platform The same single script works on WordPress, Wix, Webflow, Shopify, Squarespace, Framer, and any custom-built website. No platform-specific plugin to find and install.
Free plan with full AI included You can complete this entire 10-minute setup on the free plan — no credit card, no trial period, no feature restrictions that make the free version useless. The paid plan starts at $9 per month when you need higher conversation volume.
No approval or review process Some chatbot platforms require review before launch. Glanceia deploys immediately. When you hit publish on your website, the chatbot is live instantly.
Changes go live without touching the website After the initial embed, every update — new content, refined answers, updated pricing, new PDFs — happens in the Glanceia dashboard and takes effect immediately without any changes to your website code.
Common Questions About Fast Chatbot Setup
Is a 10-minute chatbot setup too fast to be reliable? Speed of setup and quality of result are separate things. The 10 minutes covers configuration and deployment — both of which genuinely take that long with the right platform. Quality comes from the content you upload, which you can improve continuously after launch.
Do I need to have all my content ready before setting up? No. Go live with whatever content you have ready — even a basic FAQ document. Add more content in the days after launch as you see what visitors are actually asking.
Will the chatbot slow down my website? No. Glanceia's embed script loads asynchronously — it does not block your website's content from loading and has no measurable effect on page speed or Core Web Vitals scores.
What if I make a mistake during setup? Everything in Glanceia is editable after the fact. Wrong welcome message — fix it in the dashboard. Wrong color — change it instantly. The only thing that requires touching your website again is removing the chatbot entirely, which is also straightforward.
Can I add the chatbot to multiple websites? Yes. If you manage multiple websites, you can create a separate chatbot for each one inside your Glanceia account and deploy each with its own embed script.
What happens when the chatbot cannot answer something? Configure the chatbot to acknowledge the limit and offer a direct route to a human — your email address, WhatsApp number, or a link to book a call. Set this up in the dashboard before going live.
Can I remove the chatbot if I change my mind? Yes. Delete the embed script from your website and the chatbot disappears. If you used the WPCode plugin on WordPress, simply delete the script from the footer settings. On Wix or Webflow, remove it from Custom Code and republish.
The Real Cost of Waiting
Every week that passes without a chatbot on your website is a week of:
After-hours visitors leaving with unanswered questions
Contact form submissions sitting in your inbox overnight
Leads going cold before your team can reply in the morning
Repetitive questions consuming your team's time that could go toward higher-value work
None of this is dramatic. It is just the quiet daily cost of not having a chatbot — invisible, easy to ignore, and completely preventable.
The fastest way to add a chatbot to your website is also the cheapest, simplest, and most impactful upgrade most small business websites can make in 2026.
It takes 10 minutes. It is free to start. And the results show up from day one.
Final Thoughts
The fastest way to add a chatbot to your website in 2026 is not a complicated multi-step project. It is a 10-minute process that any business owner can complete today, without technical knowledge, without a developer, and without spending a cent to get started.
Sign up. Upload your content. Customise the widget. Copy the script. Paste it into your website. Test. Done.
Your website is answering questions, capturing leads, and engaging visitors around the clock before your next meeting starts.
Ready to go live in the next 10 minutes? Try Glanceia free — no credit card needed →
Published by Laxman- Team Glanceia