What is a Chatbot Widget and How Do You Add One to Your Website?
Learn exactly what a chatbot widget is, how it works, what makes a good one, and how to add one to any website in minutes — no coding needed. Free to start with Glanceia.
Introduction
You have seen them on almost every business website you visit — a small chat bubble in the bottom corner of the screen that opens into a conversation window when clicked. Sometimes a message pops up proactively: "Hi! How can I help you?" Sometimes it just sits quietly, waiting to be clicked.
That is a chatbot widget.
It looks simple from the outside. But the technology behind it — and the business impact it delivers when set up correctly — is anything but simple.
This guide explains exactly what a chatbot widget is, how it works technically, what separates a good one from a poor one, how to choose the right one for your website, and how to add one in minutes without writing any code.
What Is a Chatbot Widget?
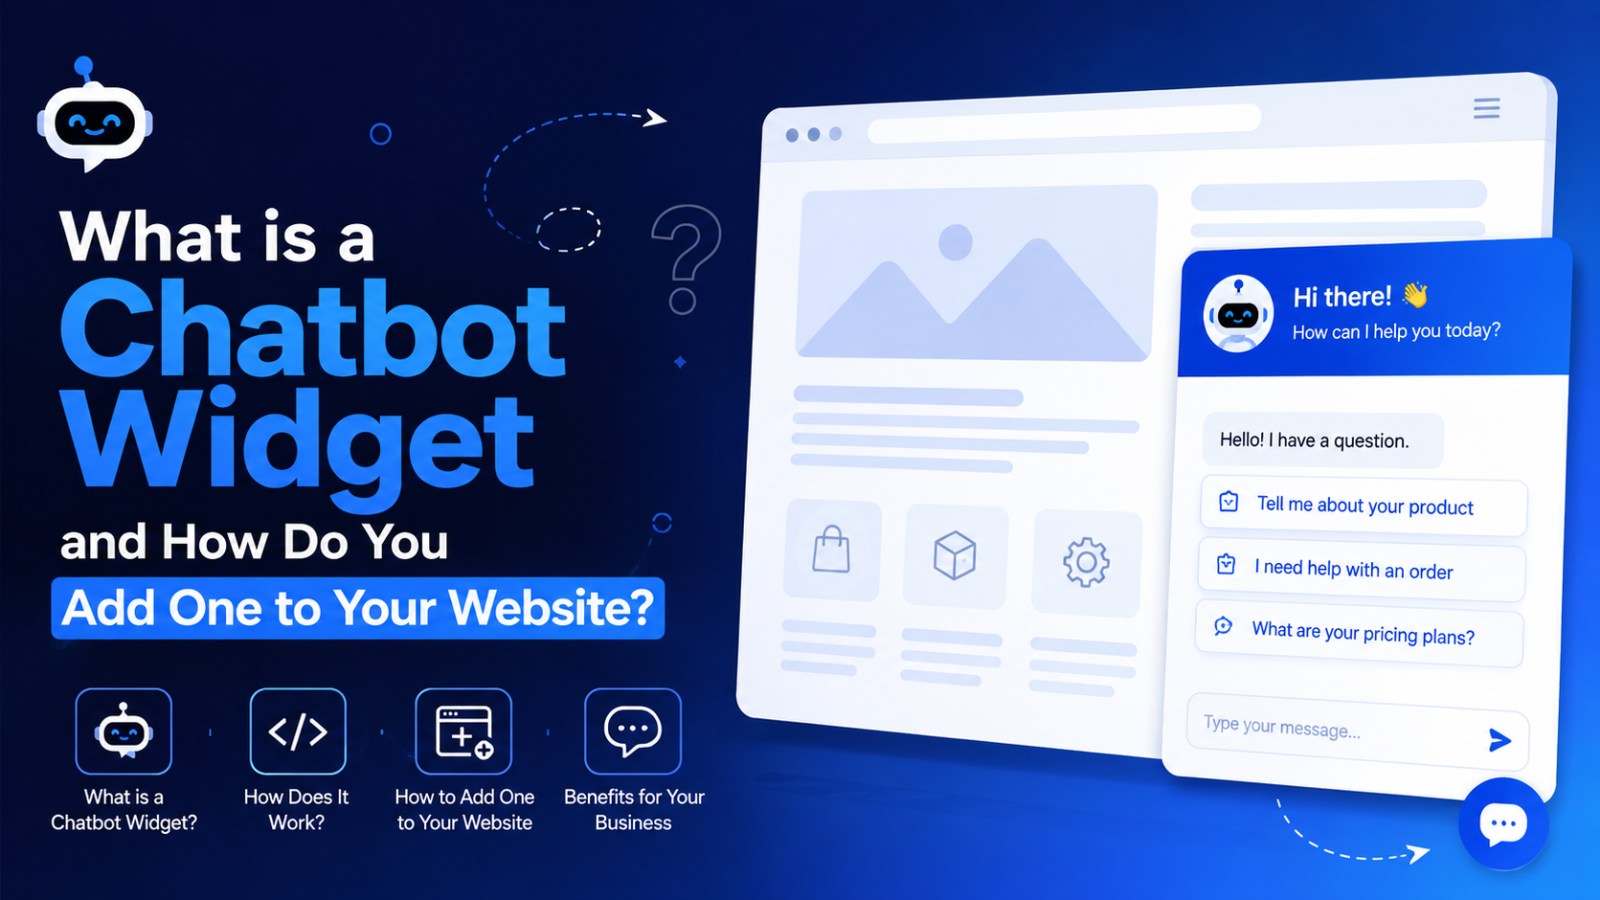
A chatbot widget is a small, embeddable interface element that sits on a website and allows visitors to have text conversations with an AI-powered assistant. It typically appears as a chat bubble icon in the bottom right corner of the screen and expands into a full conversation window when clicked or triggered automatically.
The word "widget" refers to the interface component itself — the visual element a visitor sees and interacts with on your website. The chatbot is the AI brain behind it that reads and responds to messages. Together, they form what most people call a "chatbot widget" or "chat widget."
When a visitor clicks the widget or when it opens proactively, they can type questions or messages in natural language. The AI reads those messages, searches its knowledge base — which is built from the business content you uploaded during setup — and responds with accurate, conversational answers in seconds.
Unlike a live chat widget that requires a human agent to be online and actively monitoring conversations, an AI chatbot widget works automatically. It handles conversations without any human involvement, 24 hours a day, whether your team is in the office or asleep.
How a Chatbot Widget Works — The Technical Explanation in Plain English
Understanding the mechanics helps you set one up properly and troubleshoot it when something is not working as expected.
Step 1: The embed script loads on your website When a visitor opens a page on your website, their browser reads your HTML files and executes any JavaScript it finds. Your chatbot widget is loaded through a small embed script — typically one line of JavaScript — that you added to your website's code. This script loads the widget interface from the chatbot platform's servers.
Step 2: The widget appears on screen The script injects the chat bubble into the bottom corner of the visitor's screen. The widget is hosted externally by your chatbot platform — it is not part of your website's own codebase, which is why adding a chatbot widget does not require touching your website design.
Step 3: The visitor triggers a conversation The visitor either clicks the chat bubble to open it manually, or the widget opens automatically based on a trigger you configured — time spent on the page, scroll depth, exit intent, or specific page type.
Step 4: The visitor sends a message The visitor types a question into the chat input field and presses send. That message is sent to your chatbot platform's servers via an API call.
Step 5: The AI processes the message The AI model reads the message and searches your chatbot's knowledge base — the content you uploaded during setup — for the most relevant information. It understands the intent behind the message, not just the literal keywords.
Step 6: The response is generated The AI generates a conversational, natural language response based on your specific business content and sends it back through the widget in seconds.
Step 7: The conversation continues The visitor can reply with follow-up questions. The AI maintains context throughout the conversation — it remembers what was discussed earlier and factors that into subsequent responses.
Step 8: Lead capture or escalation At a configured point in the conversation, the chatbot asks for the visitor's contact details — completing the lead capture. If the query falls outside the chatbot's knowledge base, it provides an escalation path to a human — your support email or phone number.
The Anatomy of a Chatbot Widget
A well-designed chatbot widget has several visible components that each serve a purpose:
The Chat Bubble The icon that sits in the corner of the screen in its collapsed state. This is the first thing visitors see. It should be clearly visible without being intrusive — large enough to notice, small enough not to obstruct content. The color should match your brand so it feels like a designed part of your website rather than a third-party addition.
The Header Bar When the widget expands, the header shows your chatbot's name and branding — typically your logo or business name, the chatbot's name, and an online status indicator. A professional header reinforces that the visitor is interacting with your brand.
The Conversation Window The area where messages appear in chronological order. Visitor messages typically appear on the right in one color; chatbot responses appear on the left in another. Good conversation windows are easy to scroll, have clear visual distinction between visitor and chatbot messages, and render correctly on both desktop and mobile screens.
The Input Field Where the visitor types their message. Should be clearly labelled — a placeholder like "Type your question here..." helps visitors understand what to do. The send button should be obvious.
The Welcome Message The first message that appears automatically when the widget opens — before the visitor has typed anything. This is one of the highest-leverage elements of your entire chatbot setup. A specific, business-relevant welcome message increases engagement significantly compared to a generic "How can I help you?"
The Proactive Trigger Not always visible to the visitor, but functionally important. The proactive trigger is what causes the widget to open automatically — after a set number of seconds on the page, when the visitor shows exit intent, or when they reach a specific scroll depth. A well-configured proactive trigger dramatically increases the number of visitors who actually engage with the chatbot.
What Makes a Good Chatbot Widget — 8 Key Qualities
Not all chatbot widgets are equal. These eight qualities separate the ones that deliver real business results from the ones that sit in the corner being ignored.
1. Fast Load Time The widget script should load asynchronously — meaning it does not block the rest of your page from loading while it initialises. A chatbot widget that slows your website down is counterproductive, particularly for ecommerce stores or SEO-focused websites where page speed directly affects rankings and conversion.
2. Mobile-Optimised Design A significant proportion of website visitors are on mobile devices. The chatbot widget must be clearly visible on a small screen, easy to tap with a thumb, and comfortable to use throughout a full conversation on a phone. Widgets that work beautifully on desktop but are cramped and difficult on mobile miss a substantial share of potential interactions.
3. Brand-Matched Appearance The widget color, font, and overall style should match your website's visual identity. A generic-looking widget in a color that clashes with your brand creates a jarring experience that undermines the professionalism of your website. The best chatbot platforms give you full color customisation and widget branding control.
4. AI Trained on Your Specific Business Content This is the quality that most directly affects whether your chatbot widget is useful or just decorative. A widget powered by generic AI gives generic answers that do not build trust or resolve customer queries. A widget powered by AI trained on your specific FAQ documents, service descriptions, and policies gives accurate, specific answers that feel like they came from someone who actually knows your business.
5. Proactive Engagement Capability A widget that sits passively waiting to be clicked captures a fraction of the conversations that a proactively triggered widget captures. The ability to open automatically at the right moment — when a visitor has been on the pricing page for 20 seconds, or shows exit intent — directly increases engagement rates.
6. Clear Lead Capture The widget should be configured to collect visitor contact details — name, email, and relevant qualifying information — at a natural point in the conversation. Without this, the widget answers questions but contributes nothing to your lead pipeline.
7. Seamless Human Handoff When a visitor's query goes beyond the chatbot's capability, the widget should provide an immediate, clear route to a human. A dead end — where the chatbot cannot answer and provides no alternative — is the fastest way to damage a visitor's impression of your business.
8. Conversation Data and Analytics The widget should give you access to full conversation logs and performance metrics — what visitors are asking, which questions the chatbot could not answer, how many leads were captured, and what the most common topics are. This data is essential for ongoing optimisation.
Types of Chatbot Widgets
Not every chatbot widget looks or behaves the same way. Here are the main types you will encounter in 2026:
Standard Corner Widget The most common type — a small icon in the bottom right corner of the screen that expands into a conversation window when clicked. Works on every website, unobtrusive, universally recognised by visitors as a support or chat option.
Inline Chatbot An embedded conversational interface built directly into a page — rather than floating in a corner, it appears within the page content itself. Used frequently on landing pages for lead generation or as a replacement for traditional contact forms.
Full-Page Chatbot The chatbot occupies an entire page rather than appearing as a widget on an existing page. Used for specific conversational landing pages where the entire visitor experience is designed around the chatbot interaction.
Slide-In Panel A variation where the chat window slides in from the side of the screen rather than expanding from a corner bubble. More visible than a corner widget but less disruptive than a full-page experience.
Pop-Up Chatbot A chatbot that appears as a pop-up overlay — typically triggered by exit intent or time on page. Higher visibility but can feel intrusive if poorly timed or if the visitor is in the middle of reading content.
For most small business websites, the standard corner widget is the right choice — it is unobtrusive, familiar to visitors, and compatible with every website layout and design.
How to Add a Chatbot Widget to Your Website
Adding a chatbot widget to your website is a four-stage process that takes between 20 and 30 minutes from start to finish using Glanceia.
Stage 1: Create and Train Your Chatbot (15 minutes)
Go to Glanceia and create a free account. Inside the dashboard, create a new chatbot and upload your business content.
The most important content to upload:
Your FAQ document — the questions your customers ask most often, answered specifically and completely
Your service or product descriptions — what you offer, what is included, pricing
Your key policies — returns, cancellations, booking terms, refunds
Your contact information — hours, phone, email, location
The chatbot reads everything you upload and uses it to answer visitor questions accurately. The quality of your content determines the quality of the chatbot's responses.
Stage 2: Customise the Widget (5 minutes)
In the Glanceia dashboard, configure the widget's appearance:
Color: Match your website's primary brand color using the hex code
Name: Your business name or "Support" — appears in the widget header
Welcome message: Write something specific to your business — not a generic greeting
Position: Keep bottom right unless you have a specific design reason to move it
Stage 3: Get the Embed Script (1 minute)
Navigate to the embed section of your Glanceia dashboard. Copy the single-line JavaScript embed script. This is all you need to add the widget to your website.
Stage 4: Add the Script to Your Website (5 minutes)
Find the method for your website platform below and follow the steps:
WordPress
Method 1 — Using WPCode plugin (recommended):
Install the free WPCode plugin from the WordPress plugin directory
Go to Settings → Insert Headers and Footers
Paste your Glanceia script in the Footer Scripts box
Click Save
Method 2 — Direct theme edit:
Go to Appearance → Theme File Editor
Open footer.php
Paste your script just before the
</body>tagClick Update File
Wix
Go to Settings in your Wix dashboard
Click Custom Code
Click Add Custom Code
Paste your Glanceia script
Select All Pages and Body — end
Click Apply
Publish your Wix site
Important: The widget will not appear on your live Wix site until you click Publish.
Webflow
Open your Webflow project
Go to Project Settings → Custom Code
Paste your script in the Footer Code field
Save changes
Publish your site
Shopify
Go to Online Store → Themes in your Shopify admin
Click Edit Code on your active theme
Find and open the theme.liquid file
Locate the closing
</body>tagPaste your script just above it
Save the file
Squarespace
Go to Settings → Advanced → Code Injection
Paste your script in the Footer section
Save
Any HTML Website Open your HTML file, locate the </body> tag at the bottom, paste the script immediately above it, and save.
Verifying the Widget Is Live
After adding the script and publishing your site, open your website in a private or incognito browser window. The Glanceia chat widget should appear in the bottom right corner within a few seconds of the page loading.
If the widget is not appearing:
On Wix: confirm you clicked Publish after adding the custom code — Wix holds all changes in draft until explicitly published
On Webflow: same — confirm you published after saving
On WordPress: confirm the WPCode plugin is activated and the script is in the Footer Scripts section, not the Header Scripts section
On Shopify: confirm the script was saved in theme.liquid and not in a section file
Chatbot Widget Do's and Don'ts
Getting the most from your chatbot widget involves a few consistent best practices — and a few common mistakes to avoid.
Do: Write a Specific Welcome Message
Your welcome message is the first impression every visitor has of your chatbot. Make it count.
Generic: "Hi! How can I help you today?" Specific: "Hi! Questions about our pricing, services, or how to get started? I can answer right now."
The specific version tells the visitor exactly what the chatbot can do and invites engagement. The generic version gives them no signal about its capability.
Do: Keep Your Knowledge Base Updated
Every time your pricing changes, you add a new service, or you update a policy — update your chatbot's training content at the same time. An outdated chatbot giving wrong pricing or referring to discontinued services actively damages trust.
Do: Configure Proactive Triggers Thoughtfully
Proactive triggers increase engagement dramatically — but poorly configured ones irritate visitors. A widget that opens immediately on every page the moment someone arrives feels intrusive. A widget that opens after 20 seconds on the pricing page, or when a visitor moves their cursor toward the browser close button, feels helpful rather than aggressive.
Do: Test on Mobile Before Going Live
Open your website on a real phone after embedding the widget. Check that the bubble is visible, the widget opens correctly, and the conversation is comfortable to have on a small screen. Fix any issues before considering the launch complete.
Don't: Ignore Conversation Logs
Your chatbot's conversation history is one of the richest sources of business intelligence available to you. Questions the chatbot could not answer reveal gaps in your content. Questions that appear repeatedly reveal what your website is not communicating clearly enough. Review the logs weekly.
Don't: Remove the Human Escalation Path
No matter how well trained your chatbot widget is, some visitors will need a human. Never remove or skip configuring the escalation path. A visitor who cannot get help and cannot find a human is a customer you have lost — and possibly one who will leave a negative review about the experience.
Don't: Use Multiple Competing Chat Widgets
If you already have a live chat plugin on your website, remove or deactivate it before adding an AI chatbot widget. Two chat widgets on the same page create visual clutter, confuse visitors, and create technical conflicts. Choose one — and if you are replacing a live chat tool with an AI chatbot, make the transition clean.
Chatbot Widget Pricing — What Do They Cost?
Chatbot widget pricing in 2026 spans a wide range depending on the platform and what is included.
Free tier options Glanceia offers a fully functional free plan — AI included, lead capture included, unlimited time, no credit card required. The widget includes all core functionality for low-to-moderate website traffic.
Other platforms offer free tiers with significant limitations:
Tidio: 100 Lyro AI conversations one-time — effectively a trial rather than a sustainable free tier
Chatbase: approximately 50 monthly credits, chatbot deleted after 14 days of inactivity — trial-grade
Botpress: 2,000 messages per month — the most generous free volume but requires technical setup
HubSpot: unlimited conversations but no AI on the free tier — rule-based flows only
Paid tier starting prices
Glanceia: $9 per month — AI included, flat pricing, no add-ons
ManyChat Pro: $15 per month — social channels, AI requires additional $29 per month
Chatbase Hobby: $32 per month — credit-based AI
Tidio Starter + Lyro: $68 per month minimum for AI-powered chat
Landbot Starter: $45 per month
Intercom: $39 per seat per month plus per-resolution fees
For most small businesses, the right starting point is Glanceia's free plan — test the chatbot with real website traffic, confirm it is delivering value, and upgrade to the $9 monthly plan when conversation volume requires it.
FAQ — Chatbot Widget
What is the difference between a chatbot widget and live chat? A chatbot widget is powered by AI and handles conversations automatically without a human agent present. Live chat requires a human agent to be online and actively responding. A chatbot widget works 24/7 at any conversation volume; live chat is limited by staff availability and capacity.
Will a chatbot widget slow down my website? No — if it is built correctly. Glanceia's widget script loads asynchronously, meaning it does not block your page content from loading. It will not affect your website's Core Web Vitals scores or page speed metrics.
Can I customise the chatbot widget to match my website design? Yes. At minimum, you can customise the widget's color, the chatbot's name, and the welcome message. More advanced customisation options vary by platform.
Does the chatbot widget work on all website platforms? Glanceia's widget works on WordPress, Wix, Webflow, Shopify, Squarespace, Framer, and any custom-built website via a single embed script. There are no platform restrictions.
How do I know if my chatbot widget is working? Open your website in an incognito browser window and look for the chat bubble in the bottom right corner. Click it and ask a question based on your uploaded content. If the answer is accurate and specific, the widget is working correctly.
Can I add a chatbot widget to just one page rather than every page? Yes. Add the embed script only to that specific page's code rather than your global footer. On Wix, use the page-specific custom code option. On Webflow, use page settings rather than project settings. On WordPress, use a plugin that supports conditional script loading.
What happens when the chatbot cannot answer a question? Configure the chatbot to acknowledge the limitation and provide a clear next step — your support email, phone number, or WhatsApp. This should always be set up before going live so visitors are never left without a way forward.
Final Thoughts
A chatbot widget is one of the simplest, highest-impact additions you can make to a business website in 2026. In a single embed — one line of code, added in under five minutes — you give every visitor to every page of your website an instant, intelligent way to get answers, 24 hours a day.
The widget is the interface. The AI trained on your business content is what makes it genuinely useful. The two together create a customer experience that is faster, more consistent, and more available than anything a small business team can deliver manually.
Start with Glanceia's free plan. Upload your FAQ. Embed the widget. See what your visitors are actually asking and adjust from there.
Ready to add a chatbot widget to your website today? Try Glanceia free — no credit card needed →
Published by Laxman- Team Glanceia