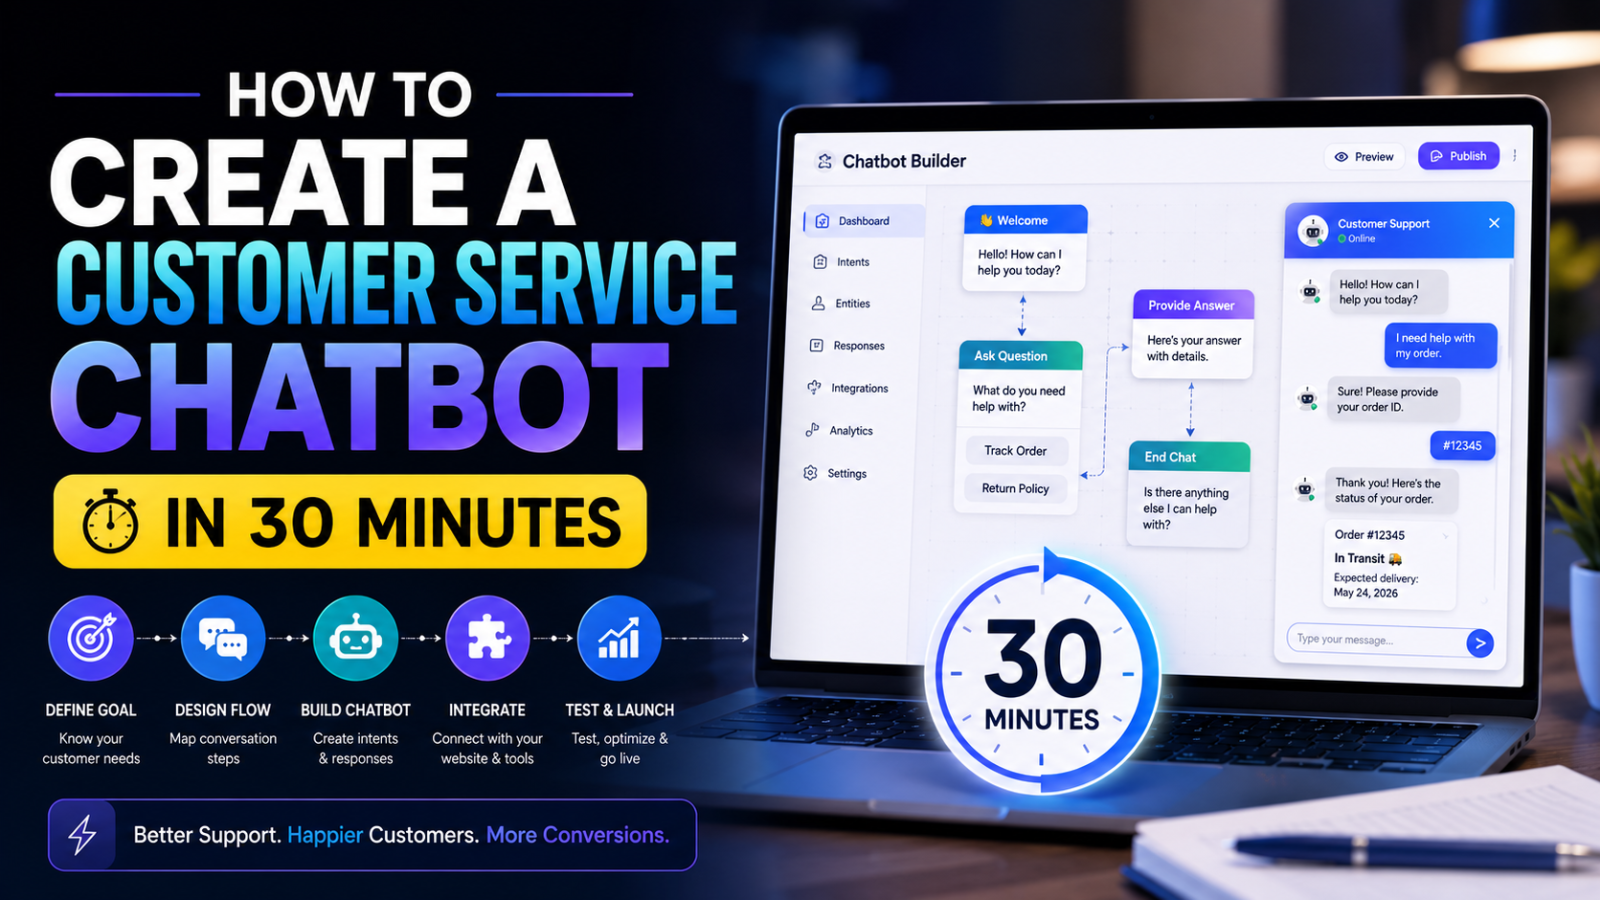
How to Create a Customer Service Chatbot in 30 Minutes
Learn how to create a customer service chatbot in 30 minutes — no coding, no developer needed. Train it on your business content and go live on your website today with Glanceia
Introduction
Your customers have questions. Your team has limited hours. Between those two realities sits a gap that costs small businesses real revenue every single day — missed inquiries, delayed responses, support queues that stretch into the next business day.
A customer service chatbot closes that gap permanently. It handles the front line of customer questions instantly and automatically — pricing, policies, FAQs, product details, booking processes — 24 hours a day, without your team needing to be present for every interaction.
The good news in 2026 is that creating one does not require a developer, a six-figure budget, or weeks of setup time. With the right platform, you can have a customer service chatbot live on your website in under 30 minutes — trained on your specific business content and handling real visitor questions before your next meeting begins.
This is exactly how to do it, step by step.
What a Customer Service Chatbot Actually Does
Before building one, be clear on what a customer service chatbot is responsible for — and what it is not.
A customer service chatbot is an AI-powered assistant that lives on your website and answers customer questions automatically. It reads through your business content — your FAQ document, your policies, your product descriptions, your service guides — and uses that knowledge to give accurate, conversational responses to visitor questions at any hour.
What it handles well:
Common FAQ questions asked repeatedly every day
Pricing and what is included in each product or service
Return, refund, cancellation, and booking policies
Step-by-step processes — how to order, how to book, how to reset a password
Product specifications and compatibility questions
Business hours, location, and contact information
Pre-purchase questions that stand between a visitor and a buying decision
What it escalates to a human:
Emotionally sensitive complaints requiring genuine empathy
Complex account-level decisions requiring access to internal systems
High-value negotiations that benefit from a human relationship
Any query that falls entirely outside the chatbot's training content
The goal is not to replace every customer service interaction. The goal is to automate the 60 to 80 percent of interactions that are repetitive and factual — so your team can focus entirely on the 20 to 40 percent that genuinely require human judgment.
What You Need Before You Start
Creating a customer service chatbot in 30 minutes requires almost nothing technical:
A computer with internet access
A free Glanceia account — takes 60 seconds to create, no credit card required
Your business content in any format — a PDF, a Word document, your FAQ page text, or your website URL
30 minutes
That is the complete list. No developer. No plugin research. No integration complexity on day one.
The most important preparation you can do before starting is assembling your content. If you have a FAQ page, a service guide, or a policy document already written — you are ready to go. If you do not, spend 15 minutes writing out the 15 to 20 questions your customers ask most often with specific, complete answers before you open Glanceia.
The 30-Minute Setup: Step by Step
Minutes 0–2: Create Your Account
Go to Glanceia and click sign up. Enter your name, email address, and a password. Confirm your email. You are inside the dashboard.
No billing page. No lengthy onboarding questionnaire. No demo call required before you can access the product. You are inside and ready to build immediately.
Minutes 2–5: Create Your Chatbot
Inside the Glanceia dashboard, click to create a new chatbot. You will be prompted for:
Name Use your business name or a simple, professional label. This name appears in the header of the chat widget on your website. Examples: "Glanceia Support," "Ask Us," "Help Desk," or simply your company name.
Default language Set this to the primary language your customers use. Glanceia supports multilingual conversations — if you serve customers in multiple languages, you can add content in those languages later.
Tone Choose the personality setting that matches your brand. A software company might want professional and concise. A lifestyle brand might want warm and conversational. A legal firm might want formal and precise. The tone setting shapes how the AI phrases its responses — not the accuracy, which comes from your content.
Minutes 5–15: Upload Your Customer Service Content
This is the single most important step in the entire process. The content you upload determines everything — the accuracy of answers, the range of questions the chatbot can handle, and ultimately how many customer queries get resolved without reaching your team.
Spend the most time here. It is where the 30-minute investment pays off.
What to upload:
1. Your FAQ Document This is your highest-value asset. If you already have a FAQ page, copy the text directly and paste it into the Glanceia training section. If you do not, write it now using this format:
Q: What is your return policy? A: You can return any item within 30 days of purchase for a full refund, provided it is in its original condition and packaging. To initiate a return, email returns@yourbusiness.com with your order number and reason for return. Refunds are processed within 5 to 7 business days of receiving the item back.
Specific, complete answers like this produce specific, complete chatbot responses. Vague answers like "returns are accepted in most cases — please contact us" produce vague chatbot responses that frustrate customers and add to your support queue rather than reducing it.
Aim for 20 to 30 questions covering your most common customer service scenarios.
2. Your Product or Service Descriptions What you offer, what is included, what is not, pricing, key differences between options. Customers frequently ask questions that require this knowledge before making a purchase — the chatbot should have access to it.
3. Your Policies Refund policy, cancellation policy, shipping policy, privacy policy summary, terms of service summary. These are the documents customers want to check before committing to a purchase or booking.
4. Your Process Documents Step-by-step guides explaining how to place an order, how to book an appointment, how to complete onboarding, how to reset a password, how to contact a human for complex issues. Procedural questions are among the most common customer service queries — the chatbot should be able to walk customers through them.
5. Your Contact and Escalation Information Business hours, phone number, email address, WhatsApp number, physical address if relevant. The chatbot should always be able to tell a customer how to reach a human when their query needs one.
Upload each document as a PDF, paste the text directly into the knowledge base, or provide your website URL and let Glanceia read your pages automatically. Use all three methods if you have content in multiple formats — the chatbot draws from everything you upload.
Minutes 15–20: Customise the Widget Appearance
Your customer service chatbot widget should look like it belongs on your website — not like a generic third-party tool bolted on as an afterthought.
Widget Color Open your website in another browser tab, identify your primary brand color, and paste its hex code into the color settings. A matching color takes 30 seconds and makes the widget feel designed rather than generic.
Welcome Message This is the first thing every visitor sees when the chat window opens. Write something that immediately tells visitors what the chatbot can help with — do not use a generic opener that gives no signal about the chatbot's capability.
Weak welcome message: "Hi there! How can I help you today?"
Strong welcome messages for customer service:
"Hi! Have a question about your order, our products, or our policies? I can answer right now."
"Hello! Need help with something? Ask me anything — I have all the answers."
"Hi there! Questions about pricing, shipping, returns, or anything else? I'm here 24/7."
Write a version that specifically references the type of support your customers most commonly need.
Chatbot Name This appears alongside the avatar in the chat window. Your business name or "Support" both work well. Avoid names that feel robotic or overly formal — "Bot-3000" creates the wrong impression.
Widget Position Keep this at bottom right unless there is a specific design reason to do otherwise. Bottom right is where users expect to find a chat widget and where click rates are consistently highest.
Minutes 20–22: Configure Lead Capture and Escalation
Two configurations that significantly increase the commercial value of your customer service chatbot:
Lead Capture Even in a customer service context, collecting visitor contact details is valuable. Configure the chatbot to ask for name and email at the appropriate moment — typically after resolving the customer's initial question. Collected leads appear in your Glanceia dashboard and can be connected to your CRM via Zapier.
Escalation Path This is essential. Every customer service chatbot needs a clear answer to the question: what happens when a customer needs a human? Configure the chatbot to provide your support email address, phone number, or WhatsApp number when a query falls outside its capability or when a customer explicitly asks to speak to someone.
A chatbot with no escalation path leaves customers in a dead end when they need real help — which is worse for customer satisfaction than having no chatbot at all.
Minutes 22–25: Get Your Embed Script
Navigate to the deploy or embed section of your Glanceia dashboard. You will see your embed script — a single line of JavaScript unique to your chatbot. It looks like this:
html
<script src="https://cdn.glanceia.com/widget.js" data-id="YOUR_CHATBOT_ID" async></script>Copy this script. This is everything you need to add the chatbot to your website.
Minutes 25–29: Add the Chatbot to Your Website
Adding the embed script to your website takes between one and three minutes depending on your platform. Follow the section below that matches your website.
WordPress The fastest method uses the free WPCode plugin:
Go to Plugins → Add New in your WordPress admin
Search for WPCode and install it
Go to Settings → Insert Headers and Footers
Paste your Glanceia script in the Footer Scripts section
Click Save
The chatbot is now live on every page of your WordPress site.
Wix
Go to your Wix Dashboard → Settings
Click Custom Code in the left menu
Click Add Custom Code
Paste your script
Set Add Code to Pages to All Pages
Set Place Code in to Body — end
Click Apply
Click Publish on your Wix site
Webflow
Open your Webflow project
Go to Project Settings → Custom Code
Paste your script in the Footer Code box
Click Save Changes
Publish your site
Shopify
Go to Online Store → Themes
Click Edit Code on your active theme
Open theme.liquid
Find the closing
</body>tagPaste your script just above it
Click Save
Squarespace
Go to Settings → Advanced → Code Injection
Paste your script in the Footer section
Click Save
Any HTML website Open your main HTML file, find the </body> tag near the bottom, paste the script just above it, and save.
Minute 29–30: Test and Verify
Open your website in a private or incognito browser window. The Glanceia chat widget should appear in the bottom right corner within a few seconds.
Ask your chatbot the five most common questions your customers ask. Verify:
Are the answers accurate and specific — drawn from the content you uploaded?
Does the welcome message display correctly?
Does the widget color match your brand?
Is the escalation path clear — does the chatbot tell customers how to reach a human when needed?
Does it work on mobile — open your website on a phone and test the full experience?
If any answers are vague or inaccurate, the issue is in the content you uploaded — not the chatbot itself. Go back to the training section, improve the relevant answer, and the chatbot updates immediately without requiring any changes to your website.
Your customer service chatbot is now live.
The First Week After Launch: What to Do
Going live in 30 minutes is the start, not the finish. The first week determines whether your customer service chatbot becomes a high-performing tool or a mediocre one.
Day 1 to 2: Monitor Every Conversation
Check your Glanceia conversation logs every morning and evening during the first two days. You will see:
What questions visitors are actually asking
Which questions the chatbot answered accurately
Which questions it struggled with or could not answer
Whether the escalation path is being used and for what types of queries
This is the most valuable data your customer service operation has access to — direct insight into what your customers want to know.
Day 2 to 4: Fill Content Gaps Immediately
For every question the chatbot could not answer well, either improve the relevant section of your FAQ document and re-upload it, or paste a specific Q&A directly into the knowledge base. Each gap you fill makes the chatbot meaningfully more capable.
Most businesses find that after 48 to 72 hours of live conversations and content refinement, the chatbot's ability to handle queries without escalation improves significantly.
Day 5 to 7: Set Up Your Integrations
Once you are satisfied that the chatbot is answering accurately, set up the integrations that make it commercially valuable:
Connect to Mailchimp or your email marketing tool via Zapier so captured leads flow automatically into your list
Connect to your CRM so customer interactions are logged against contact records
Set up email or SMS notifications for conversations that escalated to a human, so your team can follow up promptly
End of Week 1: Review the Metrics
By the end of the first week, you should have enough data to establish your baseline performance metrics:
Total conversations handled
Percentage resolved without escalation
Number of leads captured
Most common question categories
These baseline numbers become the benchmark against which you measure improvement in the coming weeks and months.
Common Mistakes to Avoid When Creating a Customer Service Chatbot
Writing vague FAQ answers The single biggest factor in chatbot performance is the quality of the content it was trained on. An answer that says "please contact us for more information" trains the chatbot to deflect rather than resolve. Write the actual answer — completely and specifically — for every FAQ entry.
Uploading content once and never updating it Your business changes. Pricing changes. Policies change. Products change. Every time something in your business changes, your chatbot training content should change at the same time. An outdated chatbot giving wrong pricing or referring to discontinued services damages customer trust faster than no chatbot at all.
No human escalation path Customers who reach a dead end in a chatbot conversation — who cannot get the answer they need and are not given a way to reach a human — leave with a worse impression of your business than if they had found no chatbot at all. Always configure a clear route to a human.
Not testing on mobile before going live A significant portion of your website visitors are on mobile devices. A chatbot that works beautifully on desktop but is difficult to use on a phone is not doing its job. Test on a real device before considering the launch complete.
Ignoring the conversation logs after the first week The value of a customer service chatbot compounds over time as you refine the knowledge base based on real conversations. Businesses that review their chatbot logs weekly and fill content gaps systematically end up with a tool that handles 80 percent or more of queries without escalation. Businesses that set and forget typically stay at 50 to 60 percent.
How to Make Your Customer Service Chatbot Better Over Time
A 30-minute setup gets you to live. These improvements — each taking five to ten minutes — progressively increase how well the chatbot serves your customers.
Improvement 1: Expand your FAQ from 20 to 50 questions The initial 20 to 30 questions cover the most common scenarios. Add 20 more based on the first week of real conversation data — questions visitors actually asked that were not covered in your initial FAQ.
Improvement 2: Add product-specific documentation If you offer multiple products or services, create a dedicated section in your knowledge base for each one. Customers asking about a specific product or service get more accurate, detailed answers when that product has its own documentation rather than being covered in a general overview.
Improvement 3: Improve your escalation messages Review the conversations that escalated to a human. Are they escalating at the right moment? Is the escalation message giving customers clear, easy-to-follow instructions for reaching your team? Refine the escalation configuration based on what you observe.
Improvement 4: Add seasonal and time-sensitive content Running a promotion? Update your chatbot knowledge base to include the promotion details so it can answer questions about it accurately. About to close for a holiday? Add a note to the chatbot's knowledge base so it tells customers about reduced availability proactively.
Improvement 5: Build a post-conversation feedback mechanism Add a simple satisfaction prompt at the end of chatbot conversations — a thumbs up or thumbs down — to identify which answers customers found helpful and which they did not. This data is invaluable for prioritising knowledge base improvements.
FAQ — Creating a Customer Service Chatbot
Do I need to know how to code to create a customer service chatbot? No. With Glanceia, the most technical step is pasting one line of code into your website settings — a 30-second process that requires no coding knowledge. Everything else, from content upload to widget customisation to lead capture configuration, happens through a visual dashboard.
How long does it take before the chatbot starts handling real customer queries? The moment you publish your website with the embed script, the chatbot is live and handling queries. Most businesses see their first chatbot-resolved customer queries within 24 to 48 hours of going live.
What if my chatbot gives a wrong answer to a customer? The answer came from the content you uploaded. If the content was vague, incomplete, or out of date, the chatbot's answer will reflect that. Go back to your knowledge base, correct the relevant content, and the chatbot updates immediately. This is why reviewing conversation logs and maintaining accurate content is the most important ongoing activity after launch.
Can I use the same chatbot for customer service and lead generation? Yes. A single Glanceia chatbot handles both simultaneously — answering customer service questions and capturing lead details within the same conversation. Configure lead capture fields alongside your customer service content and both happen automatically.
How many questions do I need in my FAQ before the chatbot is useful? A minimum of 15 to 20 well-answered questions covering your most common scenarios is enough to go live and see real value. The chatbot becomes progressively more capable as you add more content over the first few weeks.
Will the chatbot handle angry or frustrated customers well? AI chatbots are not designed to replace the human empathy required for emotionally charged customer service situations. Configure your chatbot to recognise when a customer is frustrated and immediately provide a route to a human agent — do not attempt to have the chatbot resolve complaints that require genuine empathy and judgment.
Can I add the chatbot to multiple pages on my website? Yes. Once the embed script is in your website footer, the chatbot appears on every page automatically — homepage, product pages, pricing page, FAQ page, and blog posts. You can restrict it to specific pages using the page-specific embed method if needed.
What does it cost to create a customer service chatbot with Glanceia? The free plan is available with no credit card required and includes full AI capability, lead capture, and the website widget. The paid plan starts at $9 per month for higher conversation volume. There are no hidden AI add-on fees — AI is included in every plan.
Final Thoughts
Creating a customer service chatbot is no longer a project that requires a development team, a significant budget, or weeks of planning. In 2026, it is a 30-minute task that any business owner or marketing manager can complete today — with a tool that immediately starts handling customer questions, capturing leads, and giving your team back the time they currently spend answering the same questions repeatedly.
The quality of your customer service chatbot depends almost entirely on the quality of the content you put into it. Invest the most time in your FAQ document. Write specific, complete answers. Keep the content updated as your business changes. Review the conversation logs and fill gaps consistently.
Do those things, and a 30-minute setup today becomes a customer service asset that compounds in value for years.
Ready to create your customer service chatbot right now? Try Glanceia free — no credit card needed →
Published by Laxman - Team Glanceia